 Description
This module allows you to create a slideshow of contacts; You might follow along with this better if we show you how we've made the front-end of the module looks like (the image on the right is for demonstration purposes. Screenshot was taken from an user's website with custom CSS styling).
Requirements
- Have Contact Enhanced Component installed;
- Have created at least one category and one contact;
- Install the module in the standard Joomla way through the extension manager.
Usage
- Select Extensions → Module Manager from the drop-down menu on the back-end of your Joomla! installation.
- Select add a new module and choose the new Contact Enhanced Slideshow!
- In the left hand pane title it and do all your standard Joomla positioning etc. Now, to the right side, where all the awesome new parameters (options) await!
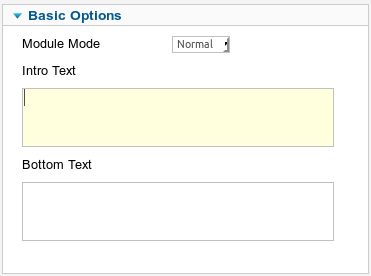
BASIC OPTIONS

Display mode: Simply lets you switch between normal and dynamic mode. Select normal to configure the module to show based on parameters you choose yourself. Choose dynamic to have the module detect if it is on a category view page and display contacts accordingly.
Intro text: is what's displayed before the main content of the module. In the instance of our example, it's the text about having a dedicated consultant.
Bottom text: is the text displayed after the main content of the module. In our example it's the bit about Cybermen not wanting to remove your emotions.
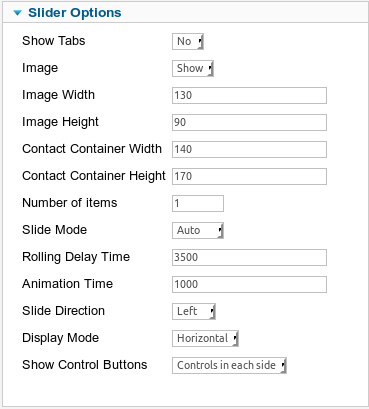
SLIDER OPTIONS

Show tabs: adds a tab with customizable text above the contacts.
Image: simply lets you decide whether or not to show a contacts image and the height and width parameters of that are hopefully self-explanatory.
Contact Container width and height: are the height of the container that holds the contact image and information. In our example this is pretty much everything that is green.
Slide mode: lets you select Auto (automatic sliding) or manual (push button).
Rolling Delay Time: is only accessible when Auto is chosen and is the time each slide shows for.
Animation time: is how long each animation between contacts takes.
Slide Direction: Which direction the slideshow will slide;
Display mode: lets you choose whether your contacts are lined from top to bottom or left to right.
Show Control Buttons: With this option you can choose whether you want no manual buttons, manual buttons in the tab bar at the top or ones either side like in our example. Note that those green arrow images were customized for another user, but you can add your own in [Path to Joomla]/modules/mod_ce_contactslider/assets/images/arrows/.
FILTERING OPTIONS

Count: is simply how many contacts you want to display, I like to leave it on the default so they all display but you know, 14 is good to.
Max Items for Each Category: simply limits the amount of contacts to be pulled in from each category.
Category Filtering Type: defines what the below category selection does. Inclusive includes the categories you selected. Exclude uses everything but the categories you chose.
Want to exclude a specific contact? Enter the ID (one a line) into the next box. We don’t like 44 so we didn’t include them.
Date Filtering: allows you to filter by date. Date Range field lets you choose which date to base these methods on. There are two to choose from. The first is Date Range which lets you only show contacts created/modified between two dates of your choosing. The other is Relative Date which allows you to enter an amount of days from the specified date for the items to show, after which, they won't.
ORDERING OPTIONS

Order your field by:
- Joomla Ordering
- Title
- ID
- Alias
- Created Date
- Modified Date
- Start Publishing Date
- Finished Publishing Date
then select underneath if you would to ascend or descend through your selection in the ordering style you chose.
ADVANCED OPTIONS

These are mostly the same as your standard Joomla advanced options with one exception: Thumbnail Mode.
This is how your images will be resized to the size you indicated way up the top in slider options.
Using resize allows you to define whether you want the image to keep it's aspect ratio or not. Crop allows you to crop the image to the size you specified.
I hope you’ve found this documentation helpful :)
Author: Tristan Brookes <code7webdesign.co.uk>


